Easy Splatter Watercolor Technique – Creative Coloring with Erum
by Erum Tasneem October 7, 2019

Hi there everyone! Erum here today with another easy watercolor technique to share.

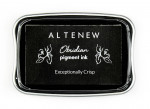
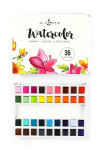
First, I stamped several flowers and leaves from the Painted Flowers Stamp Set onto watercolor paper with Obsidian Pigment Ink. Next, I cut off and separated the flowers and leaves, dividing them into two panels. After this, I sprayed the panel with the flowers, generously with water. Then, I added splatters of diluted Coral Berry Watercolor onto the already wet watercolor panel. I also added splatters of Citrus Burst and Warm Sunshine. Keep on adding these splatters until you are happy with the result.

To get a subtle look, go for a diluted watercolor. And to achieve a more dramatic effect, dry the first layer of splatters with a heat gun; then go back in and add slightly more concentrated splatters of the same shades of watercolors that you used earlier. I colored the leaves in a similar manner with Evergreen and Bamboo Watercolor. Once dry, I will fussy cut all the images.
Next, I will make my decorative element. And for that, I will use the die-cut from the Circle Quilt Cover Die and adhere the oval die-cut from the Create-A-Wreath Die Set on it. I will die cut two extra of these ovals and adhere these as a backing for the first oval die-cut to make my frame sturdy. Once my frame is ready, I will add foam tape all around it.

On my card front, I will first add fine black splatters from the Watercolor 36 Pan Set and then adhere the lacy frame on the card front. Next, I will start arranging the flowers and leaves.
To finish, I will pop the sentiment that I had lying around and adhere a few gold confetti for bling.

You can watch the process video below or on YouTube in HD.
Thank you for stopping by! Hope you got inspired by this splatter watercolor technique!
~SUPPLIES~
|