Folksy Florals in Black & White Background
by Lydia Evans January 15, 2019

Hello, Altenew friends! Norine here today with a couple of cards that check all my bright, graphic, Mary Engelbreit-loving boxes.
 So, the obvious benefit to being on the Altenew Design Team is the opportunity to play with, and share with you, the beautiful products Altenew makes and the benefit to you, dear reader, is that we can mess about and make all the mistakes and then tell you how to avoid those little frustrations! Perhaps not mistakes exactly, but there is a better way to do things and it took me a few tries to figure them all out.
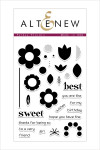
 My goal was to create the big, happy, shiny graphic flowers similar to the Mary Engelbreit's style that I mentioned earlier. I began by painting three pieces of watercolor paper with varying shades of red, peach and greens. Once they dried, I die-cut several of each of the shapes from the Folksy Florals Die set.

 To trap the color and create the big shiny flowers I wanted, I covered them all with Ultra Thick Embossing Powder and heat embossed them.
Here's what you don't need to do.
- Don't die cut the shapes, then individually stamp them with the matching stamps, using clear embossing ink and heat emboss.
- Don't stamp the paper with the matching flower stamps and clear embossing ink, heat emboss and then die cut the shapes.
- Don't die cut a bunch of watercolored shapes, individually smush them with clear embossing ink, heat emboss and then try to layer or assemble them.
 What you should do.
- Die cut all your shapes. You can die cut plain watercolor paper and then paint the pieces or vice versa. I cut all my shapes from the painted papers shown above.
- Assemble and layer them as you like, using a strong adhesive.
- Tack each bloom and leaf combo to a long strip of cardstock folded in half on itself to create a rigid “die cut holder” and to protect your fingers from your heat tool.
- Smoosh away with your clear embossing ink.
- Cover with UTEE and heat.
- Repeat steps 4 and 5.
- Let cool.
- At this point, you can assemble your card. I found that pressing the flowers against the (very strong) adhesive to make them stick, left a dull finish from fingerprints, so once the card was complete, I briefly zapped the flowers again to re-melt the UTEE and renew the shine.
 The finished result is so yummy and slick and shiny – and yes, a bit of a departure from the style of cards I usually make, but sometimes it's fun to go off in a completely different direction!
 For the card above, I paired the flowers with papers from the Essential Black & White 6×6 Paper Pack, stamped a sentiment from the Inked Rose Stamp Set and finished up with a few black enamel dots.
 For the second card, I cut long strips of the same green watercolored paper and UTEE embossed them as well. I tucked them under the blooms to create long stems and adhered them with liquid adhesive. This time, I paired the Essential Black & White patterned paper with some black paper and a narrow strip of pink watercolored paper. Then I stamped the “hello” sentiment from the Wild Ferns Stamp Set and die cut it into a circle with another circle cut mat of black beneath. Finally, I added some color coordinated enamel dots to complete the card.
I loved trying something new and different and I hope you'll be inspired to try this too! Thanks for stopping by and enjoy the rest of your day!

~SUPPLY LIST~
|