2 Stunning Masculine Card Ideas Using Birch Wood Paper
by Lydia Evans February 23, 2020

Hey, Altenew friends, Norine back with you today with some cool masculine card ideas to share! I was really excited to make these cards and I was not disappointed with the outcome! I know you're always looking for great masculine card ideas, so I hope these please you as well!
 To begin, I used some birch wood paper (can there be anything more masculine than wood paper?!) and the Striped Leaf Cover Die.


MASCULINE CARD IDEA #1
For my first card, I ran a piece of Birch Wood paper through the die-cutting machine with the Striped Leaf Cover Die. Before removing the pieces, I covered the back with a sheet of Press and Seal. The sticky surface keeps everything in place beautifully!
 Once the Press and Seal was covering the back and holding all the pieces in place, I was able to remove the cover die from the front. Afterward, I colored some of the leaves with the Altenew Artist Markers – leaving three of the leaves uncolored to let the natural shade of the Birch Paper show.
 After all (most of) the leaves were colored, (as shown above) I removed the outer portion of the die. Because of my messy coloring, I simply discarded it. Next time I might try to be more careful with my coloring so I can use it on another card.
 After the outer portion of the die-cut was removed, I used a second piece of Press and Seal to cover the front (keeping all the leaves intact, then I removed the sheet of Press and Seal from the back and applied dots of liquid glue to each of the wood pieces, (a process that goes quicker than it takes to type this out, surprisingly!) and adhered the die-cut design to the blue cardstock panel.
 While the liquid adhesive dried, I stamped the happy birthday sentiment from Label Love Stamp Set, and heat embossed it with clear embossing powder. Next, I die cut 4 layers of the word “bro” from dark brown/black cardstock using the Tall Alpha Dies and adhered all the layers together. Finally, I popped the label sentiment strips up with foam tape and adhered the alphabet die-cuts directly to the wood paper and cardstock card panel. Three metal dot embellishments completed the card.

MASCULINE CARD IDEA #2
My plan was originally to use both the inner and outer portions of the cover die-cuts for two different cards. So my next card shows what you can do if you color more carefully than I did! Here, I simply die cut a second piece and used the outer portion for my next card. Then I saved the leaf bits on a piece of Press and Seal, for another card, another day.
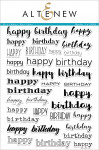
 This time, I adhered the Birch Wood paper to an A2 sized piece of cardstock and added a simple sentiment over top. Next, I stamped and heat embossed the “happy birthday” sentiment from the Birthday Builder Stamp Set, onto light brown cardstock and trimmed it into a narrow strip. Then I die cut more of the wood paper with the Fine Alphabet dies to spell “DAD” and colored each one with the Artist Markers once again.
 Finally, I added some woodgrain enamel dots from my stash to complete this card.
Thanks so much for stopping by today! I hope you're inspired by these masculine card ideas and this awesome wood paper with your stamps and dies. Have a wonderful day!
~SUPPLY LIST~
|