Try Something New: How to Create a Non-Traditional Sized Card and Envelope
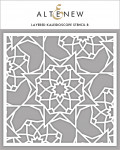
Hello, crafty friends! Today, I prepared something special for you! I challenged myself to create a masculine card inspired by a present.  I took the color palette of beige and gold and additional textures as base elements for my card. That's why I decided to use Altenew's Embossing Paste along with the Layered Kaleidoscope Stencil B.
How to create the envelope:
The non-traditional size of the card came from the size of the stencil and that's why I needed to extend the size of my Outer Envelope, which was sized 5.5″ x 8.25”.
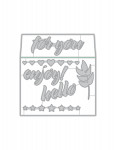
 When my card was ready, I put it into the envelope and folded the envelope cover over the card on a new line. Then, I took a wide strip of Classic Crest Solar White Cardstock, made a negative die-cut “for you” using Envelope Liner Die Set and adhered it over the envelope cover to extend it.
How to create the non-traditional sized card:

For the card, I started with the stencil and the embossing paste. Afterward, I started adding more texture and color (originally it was white). Then, I added Pure White Crisp Embossing Powder randomly and started to blend a gold color. Next, I used Antique Gold Pigment Ink and Enchanted Gold Pigment Ink to get that gold color. Finally, I blended them over the card panel and added some contrast spots.
It was my first time working with these inks and I was extremely surprised by how they are really shimmering gold, not just yellow-colored like most of the metallic inks I worked with before.  Afterward, when the main textured background was done, I adhered it to a piece of Gold Mirror Cardstock to create a tiny gold frame. And then, finally, I adhered it on a card base. A regular cardstock was too short for this size so I used a 12″ x 12″ patterned paper.
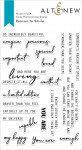
  Using the patterned paper sheet as a card base made the inner part of the card pop – this was one of those cases when the process itself guides you right to the beautifully unexpected results. Additionally, inside the card, I used Reason to Smile Stamp Set and stamped all these kind words in two colors – black and gold.
Here, I tried to show you how cool the Enchanted Gold Pigment ink is!  I hope you enjoyed my card today! Try creating a non-traditional sized card on your next crafting session!
~SUPPLY LIST~
|