Stamp Focus: Delicate Flower Bed
by Lydia Evans April 24, 2019

Hello Altenew friends, Norine back with you today with a few cards that feature the Delicate Flower Bed background stamp set. I have and love to use many Altenew background stamps but few are quite as versatile as this one, which was part of the April 2019 release! I have more ideas, but here are a few to inspire you!
 As you can see, it's a varied lot, so let's get started! The first step was to stamp up several card panels with a variety of paper types and embossing colors; white, black and gold, cardstock, and watercolor paper. From there, I ink blended, colored, and painted.
 The first card is stamped, embossed, and ink blended. I stamped all over with the background stamp and heat embossed with white embossing powder. When I plan to do any ink blending, I like to use Strathmore Bristol Smooth cardstock because it has a smoother finish that allows the inks to blend really beautifully. If you're a beginner at card-making or ink blending, you'll find it a very accommodating cardstock to work with! The two inks I used for this card are Crimson and Sunkissed, and I'm dying over the shade in the middle they created as they blended!
 To finish up this card, I stamped the sentiment on black cardstock and heat embossed with white embossing powder, then adorned it with a couple of the colored and fussy cut floral pieces leftover from the next card, and a few black enamel dots.

 The next card was a lot of fun to create! After stamping onto white cardstock, I colored all the flowers with Artist Markers then cut them allllll out! There's a definite line drawn between two conflicting camps when it comes to fussy cutting and I fall into the “love it, find it therapeutic” category, no question.
 I stamped a card panel with the Dainty Swiss Dots Stamp Set, trimmed each edge by 1/8″ and adhered it to a card base. Then I arranged all the flower sprigs to create a wreath and glued them in place with a strong liquid glue.
 Next, I stamped a sentiment from the Delicate Flower Bed Stamp Set, onto black cardstock, heat embossed with white embossing powder, and folded the ends to create a little fish-tailed banner that I popped up and adhered with foam tape. A few more enamel dots completed this card.
 This next card is much the same as the last in terms of how it was stamped and colored, but for one difference. I first stamped the background stamp onto a panel of masking paper and cut it in half in an organic, falling flowers fashion.
 I used the bottom portion to mask off the card panel and stamped again to create the cascade of blooms on the card above. Then I colored it with Artist Markers as before and added the black stamped sentiment.
 Next, I used the same colors of markers that I'd used to color the flowers and colored an ombre gradation onto some cardstock in a large enough area to layout the letter dies, then die cut the letters to spell “YOU” with the Fine Alphabet Die Set. I cut a few extra layers of plain cardstock to stack up the letters for extra dimension.
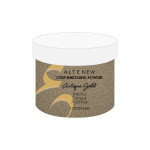
 For the last card, I created a completely different look with the same stamp set. This one is stamped on watercolor paper with embossing ink and heat embossed with gold embossing powder.
 I wanted to create a slightly more tone-on-tone, formal card, so I painted the flowers and background with the Lava Rock color from the Tropical Fiesta Set of Watercolor Brush Markers using more water to blend in the background and layering more intense color on the flower petals.
 I sliced a gap from the stamped and painted card panel to allow the stamped and gold heat-embossed the sentiment on the card front to fit within that gap. I die cut a leafy branch from black cardstock and then gold heat-embossed another portion of cardstock, from which I die cut another leafy branch, both from the Create-A-Wreath Die Set.
 As I mentioned, there are more ideas for ways to use this background stamp but time ran out and we need to save something for next time, right? Thanks for stopping by today and have a wonderful day!
~SUPPLY LIST~
|