Stand Out AND Blend In; How This Card Has it Both Ways
by Lydia Evans April 14, 2020

Hi friends! It's Norine here and it's good to be back with you! Today I'm sharing a card with a beautiful combination of stamps, a great technique, and a sentiment that both stands out AND blends in!
 I used the Versatile Vases Stamp Set with the Leaf Clusters Stamp Set and a sentiment from the Hello & Hugs Stamp Set, along with the Fine Alphabet Dies to make this card. Let me also indicate that this is the new Altenew Watercolor Paper Pad, and I am in LOVE with it!
Let's get started!
 That gorgeous texture in the watercolor paper just does me in!
I began by laying two of the Leaf Cluster stamps and one of the Versatile Vase stamps onto my stamping platform, just to be able to position them in order to not overlap in important areas but to still be able to keep most of the image on the paper.
 I started stamping with the left-hand leaf image. Then, I rubbed the impression side of the stamp with a white art eraser to both, clean it and give it some “tooth” for the watercolor paint to cling to! Not so much eraser that there are rubber crumbs hanging around, but enough to make the surface cloudy.
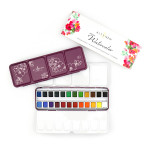
 Next, I painted the leaves on the stamp with a combination of yellow, teal, dusk, bright green and moss-green paints from the Artists' Watercolor 24 Pan Set and quickly closed the door on the stamping platform to press the wet paint into the paper. Before the paint dried, it blended in some places and, where the pigment didn't move much, I encouraged it to blend by adding more water with a wet paintbrush. I repeated this step with the second leaf image (after again putting down the vase to be sure of the position of the 2nd leaf stem).
 By quickly stamping down with the stamps and not leaving them on the paper too long, the excess water that has fallen into the cracks of the stamp itself doesn't have as much chance of spreading onto the paper and distorting the image outlines. If you look closely, you can see that it did in one or two places (where a couple of the leaves have a color bridge between them) but overall the image is clean yet artsy. Finally, I stamped the vase image, using blue paint for the “ink” and immediately diluting with water, to paint the outline color into the center of the vase.
 At this point, I added some of the same paint colors to a loose wash in the background of the leaves. Once it was all dry, I used two different sized tip permanent pens to add some wavy, sketchy pen lines around a few of the leaves and added more leaves where there was background color, but no stamped image. I also sketchily outlined the vase with black pens and then added some black paint splatters.
Now for the explanation of the post title!
 I positioned the Fine Alphabet dies to spell MOM on the front of the card and ran the card panel through the die-cutting machine to cut them out. I cut the same letters from some white fun foam and adhered them to the backs of the alphabet die-cuts. Then, I placed them back into their opening and adhered the card front to a coordinating green cardstock mat. Next, I stamped a sentiment from the Hello and Hugs Stamp Set with Embossing Ink on gray cardstock, and heat set with white embossing powder before trimming it into a narrow strip and adhering it on top of the die-cut word. I love the subtleness of the letters that both blend into the scene, yet stand out with the extra dimension!
 Thank you so much for stopping by today! I hope that you are getting some extra time to be creative these days. You might even be inspired in your paper crafting by this card!
~SUPPLY LIST~
|